


2017 Business of the Year
Alewel’s Country Meats had been recognized as “Business of the Year 2017” by the Chamber of Commerce!
We love to use chipotle in our recipes. Our chipotle raspberry bacon and chipotle bratwursts are definitely popular items. Chipotle delivers a spicy kick that can take any dish to a new level. Here is your rundown of what chipotle actually is and how you can use and enjoy it!
What It Is:
A chipotle is a smoke-dried jalapeño chili used primarily in Mexican, Mexican-American, Tex-Mex, and Mexican-inspired cuisine.
There are many varieties of jalapeños which vary in size and heat. When jalapeños are left on the vine for a long time they turn a deep red and have lost much of their moisture, these are selected to be made into chipotles. In a closed smoking chamber, they are spread out on metal grills. The jalapeños already have an underlying heat and this process helps add in a smoky taste as well. Chipotles are about 5,000 to 10,000 Scoville Units, which is considered a “medium” heat.
How To Use It
Chipotles have a relatively mild, yet earthy spiciness. The chiles are used in soups, stews, sauces, and various salsas. Chipotle chiles can also be ground up and combined with other spices to make a meat marinade known as an adobo. Chipotles are available dried whole, powdered, canned in “adobo sauce,” or pickled.
How To Make Your Own Dried Chipotle Peppers:
When shopping for chipotles, try to find dried whole ones because you can do so much more with them than just the adobo sauce. If you need them hydrated, simply place a chili or two in hot water for about an hour then remove the stems. Keep the seeds if you want more heat in your pepper, or simply remove seeds to tone it down a bit.
If you have a recipe that uses hot peppers, definitely try swapping in chipotles.The smoky flavor and the pepper’s heat will add a lot to what you cook though, so be careful and don’t over do it. Be sure to taste test before you cook or season.
Don’t let a fear of the heat keep you away though. Most products made with chipotle are toned down, so if you’re not a big fan of HOT – you may still enjoy chipotle-flavored things. Check out our Raspberry Chipotle Marinated Chicken Breast, Raspberry Chipotle Bacon, Raspberry Chipotle Brats, Chipotle Pepper Bacon, and Chipotle Pork Loin.
May is Beef Month so get your grill ready!
If you’ve ever been asked what your favorite cut of steak is and responded “regular steak,” it’s time for a beef education. Knowing the grades and cuts will help you order with confidence and discover the delicious differences between them. Get ready for a crash course in beef:
Know your grades.
First thing to note is that there are eight grades of beef, but only the top three—prime, choice, and select—are identified when meat is sold at retail. Prime is the highest grade. It’s produced in limited quantities and most often found at fine restaurants and some specialty shops. Choice and select are the grades of beef typically available, respectively, in the service and self-service meat case at the grocery.
The difference in these grades is the marbling. You’ve probably heard someone say they prefer a steak with more marbling. This refers to the flakes of fat disbursed throughout the muscle. It has nothing to do with the exterior fat. It makes a juicy steak even tastier. It is a top priority for Alewel’s Country Meats to select beef that will provide the best marbling and flavor for our customers.
Make the cut.
There are more than five dozen different beef cuts available today, and many of them have multiple names (Kansas City Steak and New York Strip are both Top Loin Steaks). Newer cuts of beef like Flat Iron Steak and Ranch Steaks are from cuts of meat that were usually part of a beef roast.
Some of the most common are:
Be your own butcher.
Meat is expensive. That’s simply a fact. And since most of what we cook on the grill is going to be meat, we need to be smart about it. Choose less expensive cuts of meat while trying not to sacrifice quality. You can do this by avoiding specialty cuts. Frequently butchers charge more for some cuts of the same piece of meat. If you look through the meat counter at the grocery store, you can see what I am talking about.
For this reason, it is a good idea to learn how to carve your own cuts. Buying large “primal” cuts of meat is usually cheaper. All you have to do is cut these into small pieces. For instance, buy whole Rib Eye and cut it into Steaks.
Grill it right.
You do not want to overcook steak. Always start with a clean grill (see our cleaning how-to) – put a light coat of vegetable oil on to prevent sticking. Never use spray cooking oil though.
Cooking Steps:
Recommendations on cooking times over direct heat:
Recommendations for cooking over indirect heat:
Season your steak after you take it from the grill. When you start with a prime or choice steak, you can season with salt and pepper but don’t use sauce. And as always, let rest for 5 minutes before serving – remember the steak will continue to cook.
Now make your way to Alewel’s to pick out your steak to celebrate Beef Month!
Get ready to serve up the other white meat.
Pork often gets a reputation for being a fatty meat, but it is actually quite lean and can be a versatile and nutritious option for your dinner table. Some of our favorites are our Pork Grillers (pork tenderloin wrapped in bacon), ribs for the grill, and marinated inside pork tenders! It’s important not to overcook pork because it can become tough and dry. When cooking, it’s best to use a food thermometer to test for doneness. Most pork cuts should be cooked to an internal temperature of 150 degrees, where the meat is slightly pink on the inside.
Check out our cooking instructions for all your favorite cuts:
Pork Roast:
Pork Chops:
Pork Tenderloin:
Smoked Pork Loin:
Inside Tender:
Pulled Pork/Pork Butts:
Because of the fat marbling, pork shoulder won’t dry out like other cuts of meat. You can skip all the traditional rubs, mops, and sauces. It will stand alone on the flavor of the meat and smoke.
When it comes to storing, fresh pork can be refrigerated 3 to 4 days. Frozen will be good for 6 months, unless it’s cured then only 3 months.
Want more information on pork? Check out our Pork Basics page!
Now that you’ve brought home the bacon, put it to good use.
Is there any better sound (or smell) to wake up to than the crackling goodness of bacon? We don’t think so. People adore these strips so much that they add them to absolutely everything—burgers, mac and cheese, chocolate. You name it, someone has tried it!
Here at Alewel’s, we like to wrap our beef fillets and stuffed chicken breasts in bacon to add that extra dose of flavor. We also love to pile up our Cajun or Jalapeno bacon for delicious BLTs. Most bacon is cured, but the difference in Alewel’s bacon lies in how we cure our product. Our regular process does use water to cure, but when the bacon comes out of the smokehouse it’s back to it’s beginning weight, which means it’s not a water-added product like some bacon.
So let’s look at how to prepare and store these tasty strips!
How to prepare
Pan Frying:
Microwave:
Oven:
What causes splattering?
Bacon that contains high amounts of water, which is used for curing, can splatter. This happens when you cook the bacon too fast and use a high heat. Avoid this by cooking on a lower heat for a longer time. Be patient with your bacon.
Storage Tips:
Cured bacon is not cooked, but will keep for 2 to 3 weeks in the refrigerator. If you freeze, it will last only 3 months because the salt in the cure doesn’t allow the bacon to freeze solid like fresh meats. When reheating bacon, be sure not to overcook because it will crisp up.
Bacon Per Pound
So you know how much bacon you’re going to get. A pound of bacon can result in different amounts based on how thick the slices are. Here’s our guide:
Thin-sliced bacon is approximately 20 to 23 slices per pound.
Medium-sliced bacon is approximately 16 to 18 slices per pound.
Thick-sliced bacon is approximately 12 to 14 slices per pound.
If you want to get creative with how you use your bacon, check out these 50 ideas for using bacon. A bacon martini, why not? There really is no wrong way to enjoy these delicious strips.
Find the perfect Alewel’s gift basket for everyone on your list.
It’s easy to get lost in all the options for holiday gifts. That’s why we’ve simplified the shopping for you! Alewel’s gift baskets make a delicious present, and we’ve crafted options for all the loved ones on your list this year.
For The Breakfast Lover
Give the “Breakfast Present” basket to that relative who lives for the smell of coffee and bacon in the morning. With cured bacon, country ham slices, canadian bacon, assorted jellies, and biscuit mix, they’ll have everything they need for an amazing morning spread.
For The Bacon Addict
Snag the “Achin’ For Some Bacon” for the friend who piles this salty favorite on every dish. Think of the BLT varieties they could concoct with cured bacon, peppered bacon, dry cured bacon, cajun bacon, and raspberry chipotle bacon.
For The German
Try the “Bunch Of Brats” for the person who longs for the flavors of Germany (or a perfect sausage for tailgating). They’ll have cured and smoked bratwurst, German franks, bratwurst with cheese, hot German franks, and cranberry and cheese bratwurst to bury under mounds of sauerkraut.
For The Jerky Lover
Reach for the “Jolly With Jerky” to give your coworker who’s always looking for a tasty snack. They’ll have a solid supply with the beef logs, beef old timer, beef muscle jerky, and cheese curds in this basket.
For The Spice Master
The possibilities are endless when you give the “Season’s Seasonings” basket. Your culinary mastermind of a friend will appreciate this scrumptious kit that includes our Grill-in & Grill-out seasoning, BBQ seasoning, Steak & Roast rub, and Sweet & Sassy garlic.
For The One Who Wants It All
Can’t narrow it down? Go for the “Merry Medley.” With smoked turkey breast, cured and smoked chops, country ham slices, dry cured bacon, logs of jerky, and summer sausage, they’re bound to love it all!
Order these baskets (and more) in stores! Happy holidays from Alewel’s!
Thanksgiving is all about the turkey, so make sure you’re ready to deliver this year.
We all love the mashed potatoes, stuffing, and pumpkin pie, but the turkey is the cornerstone of the day. To ensure you have all the information you need to prepare the perfect bird, we’ve rounded up all our best tips and tricks.
Tips For Buying Turkey
What is a self-basted turkey?
Self-basted turkeys have been injected or marinated in a solution which usually contains edible fat, natural broth, stock or water, and seasonings. Self-basted turkeys are labeled with the percentage of solutions and their ingredients. Choose un-basted turkeys – you don’t want to pay for water!
Turkey Storage:
Fresh turkeys should be stored at 26 to 40°F. But frozen turkeys should be stored at 0°F or below. You can store a frozen bird for up to 12 months. This means you can snag a bird during value sales and hold onto it until Thanksgiving or buy an extra one to put on your smoker later on.
How To Thaw Your Turkey
You can thaw under refrigeration, in cold water, or the microwave:
Once thawed, keep turkey refrigerated at 40°F or below until it is ready to be cooked (with the exception of microwaved thawed turkey which should be cooked immediately).
To Smoke A Turkey
Smoked turkey doesn’t need a recipe as seasonings, ingredients and spices are not necessary. You can add a little salt, pepper or poultry seasoning, but the smoke provides the principle flavor.
Don’t be afraid, however, to get creative with that smoke by experimenting with different types of wood — hickory or mesquite being the most popular. Any chunks or chips of water-soaked hardwood or fruitwood will work, but do not use softwoods like pine, fir, cedar, or spruce as they will give the food a turpentine flavor and coat it with an ugly and inedible black pitch.
Also, instead of smoking with water, try wine or juices. Try Hickory Chips that had been soaked in a mixture of red wine and apple juice. This same liquid was then poured in the water pan and used for the smoking process.
Smoking time depends on the size of the turkey, the distance from the heat, temperature of the coals, as well as the outside air temperature. You can roughly estimate about 20 to 30 minutes per pound of turkey, but it’s important to use a meat thermometer to be sure your turkey is thoroughly cooked. The turkey is done when the food thermometer, placed in the inner thigh, reaches 180°F (be sure the thermometer is not touching the bone).
Important Reminders:
Steps For Grilling
5 Tips For Food Safety:
U.S. Department of Agriculture’s (USDA) Food Safety and Inspection Service shared five tips to ensure food safety this Thanksgiving. Be sure to keep these in mind when you’re doing holiday prep!
No matter which way you decide to cook your turkey, enjoy it!
Happy Thanksgiving from all of us at Alewel’s!
You may not be able to control the outcome of the game, but you can ensure the menu scores major points.
It’s all about the spread when you’re hosting a tailgate. You’ve got to come ready. We know you want to impress on Game Day, so we are here to help. To make sure you can get out of the kitchen and into the game, we’ve broken down the easiest prep steps.
Day Before The Game
First thing’s first, you’ve got to get organized. Make a checklist so you don’t end up at the party without plates. Believe us, it happens. Here is an example of our checklist.
Tailgate Must Haves:
Be creative with your tailgate planning, but keep it simple. Sometimes coming up with a theme makes the menu planning easier. BBQ, Mexican, Cajun, etc. Be sure to factor in the temperature and what will hold up well in the heat of those early games. Dips and desserts can easily be made beforehand and packed up. When it comes to desserts, think hand-held such as cookies, brownies, or dessert bars that require no dishes or silverware. Definitely throw in a couple bags of chips. People will always want to grab a handful.
Having a pot of chili or taco soup is a delicious, hearty, and easy choice, especially when it’s cooler outside. You can also go to the deli store and pick up prepared items such as meat and cheese trays, veggie trays, fruit trays—anything to keep the stress level down. Be sure to also grab beverages the day before (and don’t forget to have kid-friendly options).
Day Of Game:
DON’T FORGET THE TICKETS.
If you do, everything else is pointless. Now that you’ve covered that, load the vehicle following the checklist you made yesterday. Put your drinks on ice to make sure they’re nice and cold when the fans start showing up. Then pack up your smoker or grill.
Here at Alewel’s, we’re die-hard University of Missouri Tiger fans. Tigers are carnivores, so you can be sure we never host without at least a couple meaty dishes. Beef tri tip, brisket, slab of ribs, brats, burgers. Try a different option for each game of the season.
At The Game:
Set the tone by putting up your team’s flag, laying out some color-coordinated decorations, and setting up any tailgating games. Unpack your prepared appetizers and snacks. Now, it’s time to fire up that grill.
There are two rules of thumb for food at a football gathering: There should be lots of it, and it has to be good. After that, it’s just about enjoying the atmosphere and rooting for your team!
Outdoor entertaining at its finest and easiest.
Put the endless, tantalizing combinations of kabobs on display for your next backyard party. You can even assemble them pre-party, so your day-of is stress free. Grilled to perfection in minutes and cleaned up in seconds, kabobs are a host’s dream.
What ingredients should I use?
Mindful mixing can take your kabobs to another level. One we love is poultry, pork, or ham with a fruit like pineapple chunks, apricot halves, peach or apple wedges. The flavors complement each other for the perfect mix of sweet and savory. Try these meats and vegetables to get you started.
Meats
Vegetables And Fruit
Don’t forget to marinate.
Add in extra flavor by marinating before grilling. Try bottled salad dressings like French, Italian, or Ranch for chicken. Use Teriyaki, Sweet n’ Sour, or Greek marinade on pork. Feel free to get creative though! There are many marinade mixes and bottled concoctions from fruit-based to spicy hot sauces. (For our kabobs, we use a Southwestern marinate on our beef and a Greek on our pork ones.)
Note: As always, don’t reuse a marinade or sauce on food you’re cooking that has been used with raw food. Discard any liquid that raw meat, poultry, or seafood has been in. Wash all kitchen utensils and dishes thoroughly before reusing.
Choosing Your Skewers
We recommend skewers with flat blades. The round ones can easily turn inside the food, making it difficult to rotate the pieces of food. If you only have round ones, use two per kabob to keep things in place. There are also double-prong skewers, which hold the meat and vegetables in place and can easily be turned over.
If you use wooden skewers, they must be soaked in water for about 30 minutes before using to prevent burning.
Kabob Prep:
Grill Times
The following times are highly variable. It depends, of course, on distance above the coals and the actual temperatures. We suggest 4 inches above medium-hot coals. Kabobs with tightly packed ingredient will need more time.
Turn all kabobs frequently as they’re grilling. Baste with additional sauce occasionally and wait until the last few minutes of grill time to baste with sweeter sauces, especially if they contain sugar. Sugar will burn faster and turn black.
And that’s it! You are ready to serve up these delicious combos at your next picnic or outdoor party. Make a whole main course of kabobs or use them for appetizers. Either way, you can’t go wrong.
You likely know how to whip up a tasty tailgate menu, but do you know how to ensure your grill is doing its part to make your party a success? From type of grill to temperature and cleaning tips, we have compiled everything you need to know to be a grill master.
The age-old debate. We don’t have a hard stance on a “superior” choice, but each type does have its advantages. Gas grills are quick and easy to use. If you are a grilling newbie, they’re a great option to make sure you cook to perfection on the first try. They’re consistent, so you don’t have to monitor them as closely (giving you extra time to try out that corn hole game).
Charcoal has it’s pluses as well; one of which being that it’s the authentic grilling experience. After the fuel igniter burns off, it infuses your meat with that quintessential smokey taste. It can be harder to control the heat of a charcoal grill though, so it requires more focus from you. If you do decide to use charcoal, note that lump charcoal burns faster and hotter than the briquettes.
Is it hot enough?
There is a quick and easy way to know if your grill is at the right temperature. Other than using a thermostat, you can check by holding your hand five to six inches from the grilling surface. You’ll know you’ve reach the right temp when it feels hot at the below times:
Should you put a lid on it?
If you are grilling, it’s going to be at a high heat so keep the lid open. However, when you are barbecuing, you are going to want a slow and low burn for that delicious fall-off-the-bone flavor, so keep that lid closed.
Choose your tools wisely.
Your grill is the mastermind behind the endeavor, but some key tools can always lend a helping hand. Instead of using a fork, which can pierce the surface of your product and release those flavorful juices, use tongs or a spatula to turn your grill items. It’s also a good idea to keep a spray bottle of water nearby to spritz flare-ups on the grill.
Cleaning How To:
Make sure your grill is ready for anything you throw at it by taking the time to properly clean it. You want to scrub the grates after every use and the burners on a fairly regular basis.
Be sure to stop by the store to pick up everything you need for your tailgate! Have grill care questions we didn’t answer? Place them in the comments, and we’ll make sure you get all the information you need to be a grill master!
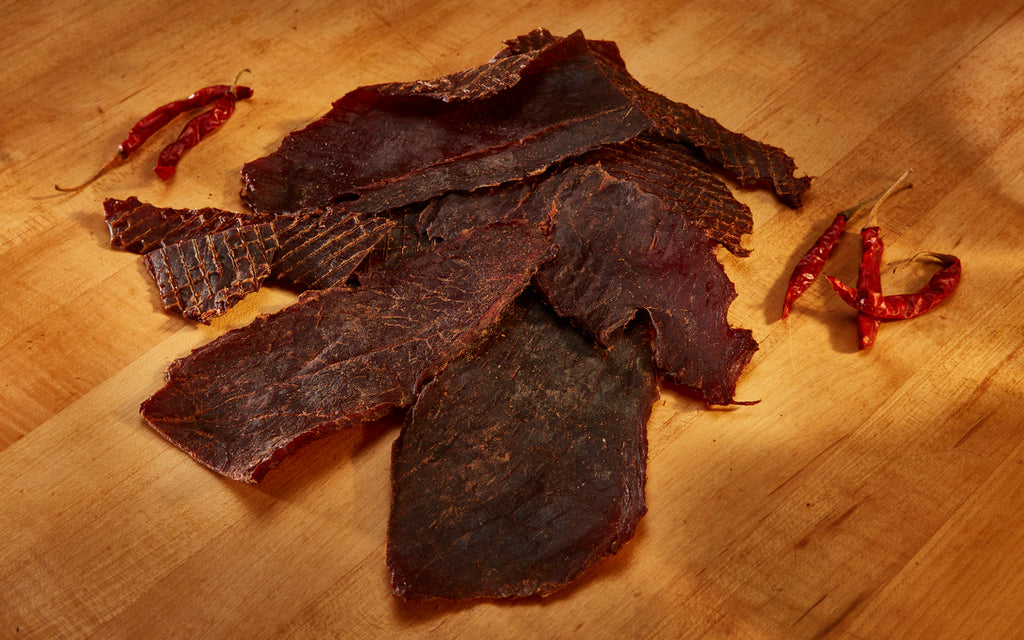 We offer 3, 6, and 12 month programs for our
award-winning beef jerky. Join our monthly jerky
program today to get award winning meats delivered
directly to your doorstep!
We offer 3, 6, and 12 month programs for our
award-winning beef jerky. Join our monthly jerky
program today to get award winning meats delivered
directly to your doorstep!
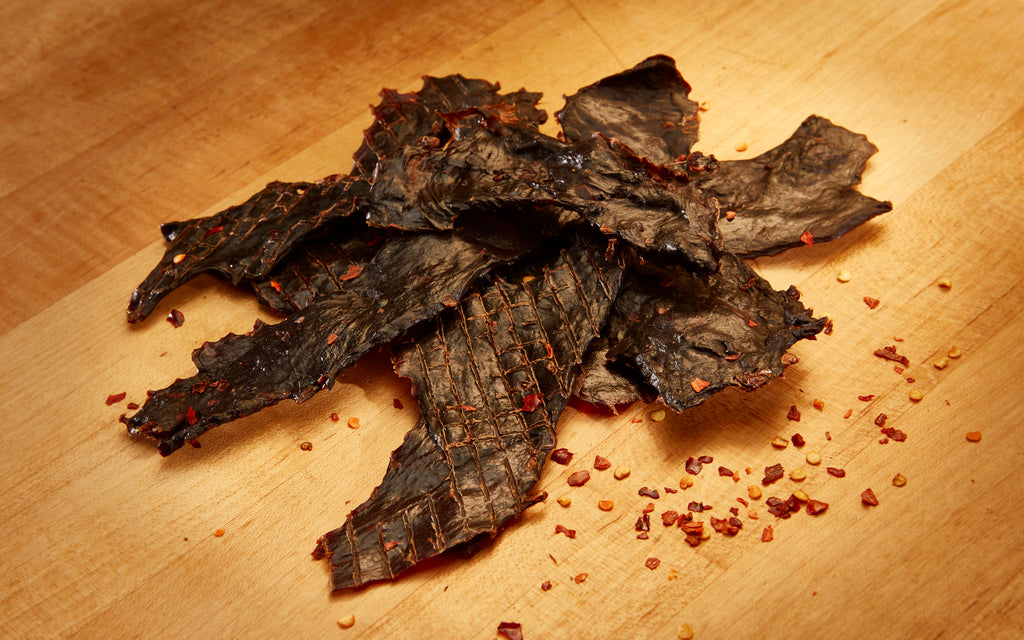 Alewel’s has competed on the national stage for over 50
years. Most recently recognized in “REAL SIMPLE
MAGAZINE’s April 2018 edition as Best Original Beef
Jerky! “Tasters fell for the classic chew and mild kick”
Alewel’s has competed on the national stage for over 50
years. Most recently recognized in “REAL SIMPLE
MAGAZINE’s April 2018 edition as Best Original Beef
Jerky! “Tasters fell for the classic chew and mild kick”


